如题!
一、编辑gitlab.rb
打开配置文件:
vim /etc/gitlab/gitlab.rb增加Oauth配置:
gitlab_rails['omniauth_enabled'] = true
gitlab_rails['omniauth_allow_single_sign_on'] = ['oauth2_generic']
gitlab_rails['omniauth_block_auto_created_users'] = false
gitlab_rails['omniauth_providers'] = [
  {
    'name' => 'oauth2_generic',
    'app_id' => '9485dcbc-2109-42aa-bffb-320d49a3478a',
    'app_secret' => '$2a$10$dQF7IXNZQgOy8bkXTUvwv..zr3sSItgdQtiJAcegcV4yXai3m.Hva',
    'args' => {
      client_options: {
        'site' => 'https://www.dev.claves.com.cn',
        'authorize_url'=>'/console/connect/sso',
        'token_url'=>'https://api.dev.claves.com.cn/auth/oauth2/token',
        'user_info_url' => 'https://api.dev.claves.com.cn/auth/oauth2/userInfo'
      },
      user_response_structure: {
        root_path: [], # i.e. if attributes are returned in JsonAPI format (in a 'user' node nested under a 'data' node)
        attributes: { name: 'username', nickname: 'nickName'} # if the nickname attribute of a user is called 'username'
      },
      name: 'claves', # display name for this strategy
      strategy_class: "OmniAuth::Strategies::OAuth2Generic" # Devise-specific config option Gitlab uses to find renamed strategy
    }
  }
]
配置文件修改完成后,重设配置:
gitlab-ctl reconfigure重设完毕,等待约30秒。
二、关联Gitlab账号
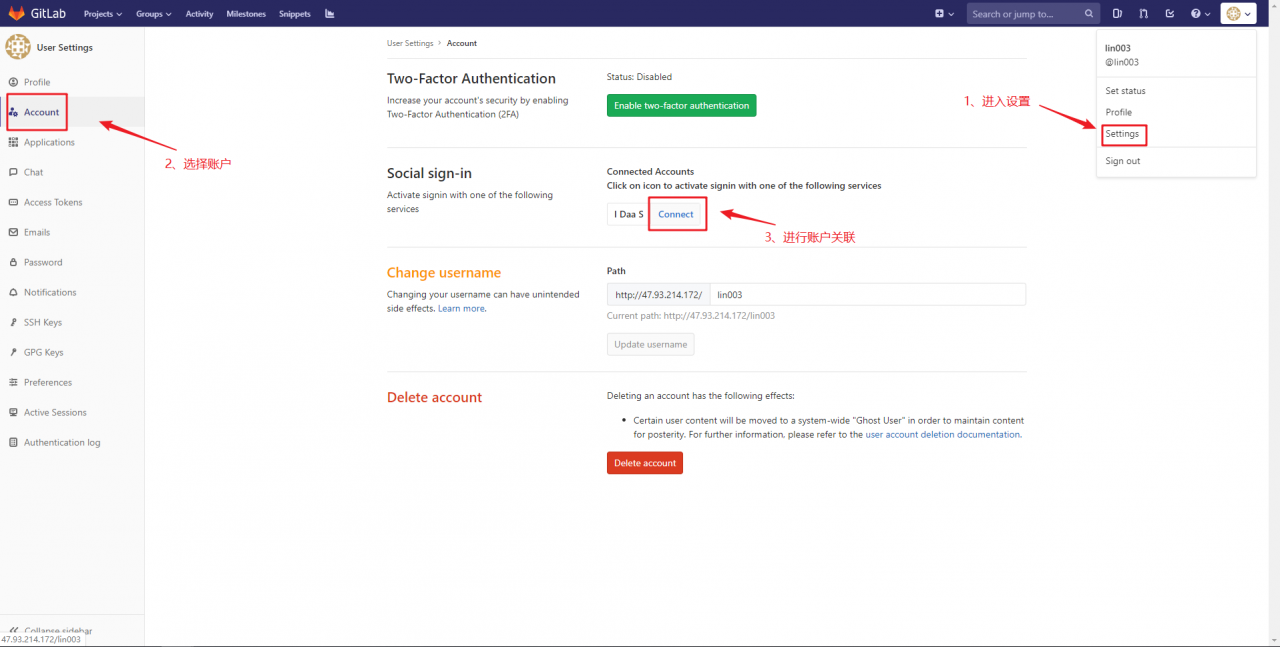
用户登录gitlab之后,在setting-Account 中点击Connect进行账户关联。

关联成功后,即可使用登录页的Oauth2登录。
三、注意事项
Gitlab貌似必须要手动关联后,才可单点登录。在这个坑里面爬了累计4、5个小时候,才发现必须要手动管理。